Install the operating system
The Raspberry Pi does not come as a pre-installed computer, but luckily installing an operating system for your Raspberry Pi has become easier then ever before.
Table of contents
- Using NOOBS
- Other installation options
- Using the Raspberry Pi Imager
- Setting advanced settings
- Connecting
- Using Etcher
Using NOOBS
In general, it is recommended that beginners buy the Raspberry Pi with a micro SD-card that has NOOBS (New Out Of Box Software) installed. It is true that this makes things easy by enabling you to simply plug-in the SD card into your Raspberry Pi and follow the installation steps to install a wide range of operating systems. However, I tend to recommend, also to complete beginners, to do a manual installation, which, with the new Raspberry Pi Imager software, has become a breeze.
Other installation options
In the first years after its release, setting-up an SD-card with the Raspbian Operating System was a long and complicated process. Then a couple years ago it became a lot more straightforward by software like Etcher, which made it as simple as mounting the SD-card and downloading and installing from an OS image file (see below). In 2020 the Raspberry Pi Foundation released their own installer, which is now, in my opinion, the preferred way to install the Raspberry Pi Operating System.
Using the Raspberry Pi Imager
Download the Raspberry Pi installer from the (raspberrypi.org/downloads/) website, make sure it is properly installed, and launch the program.
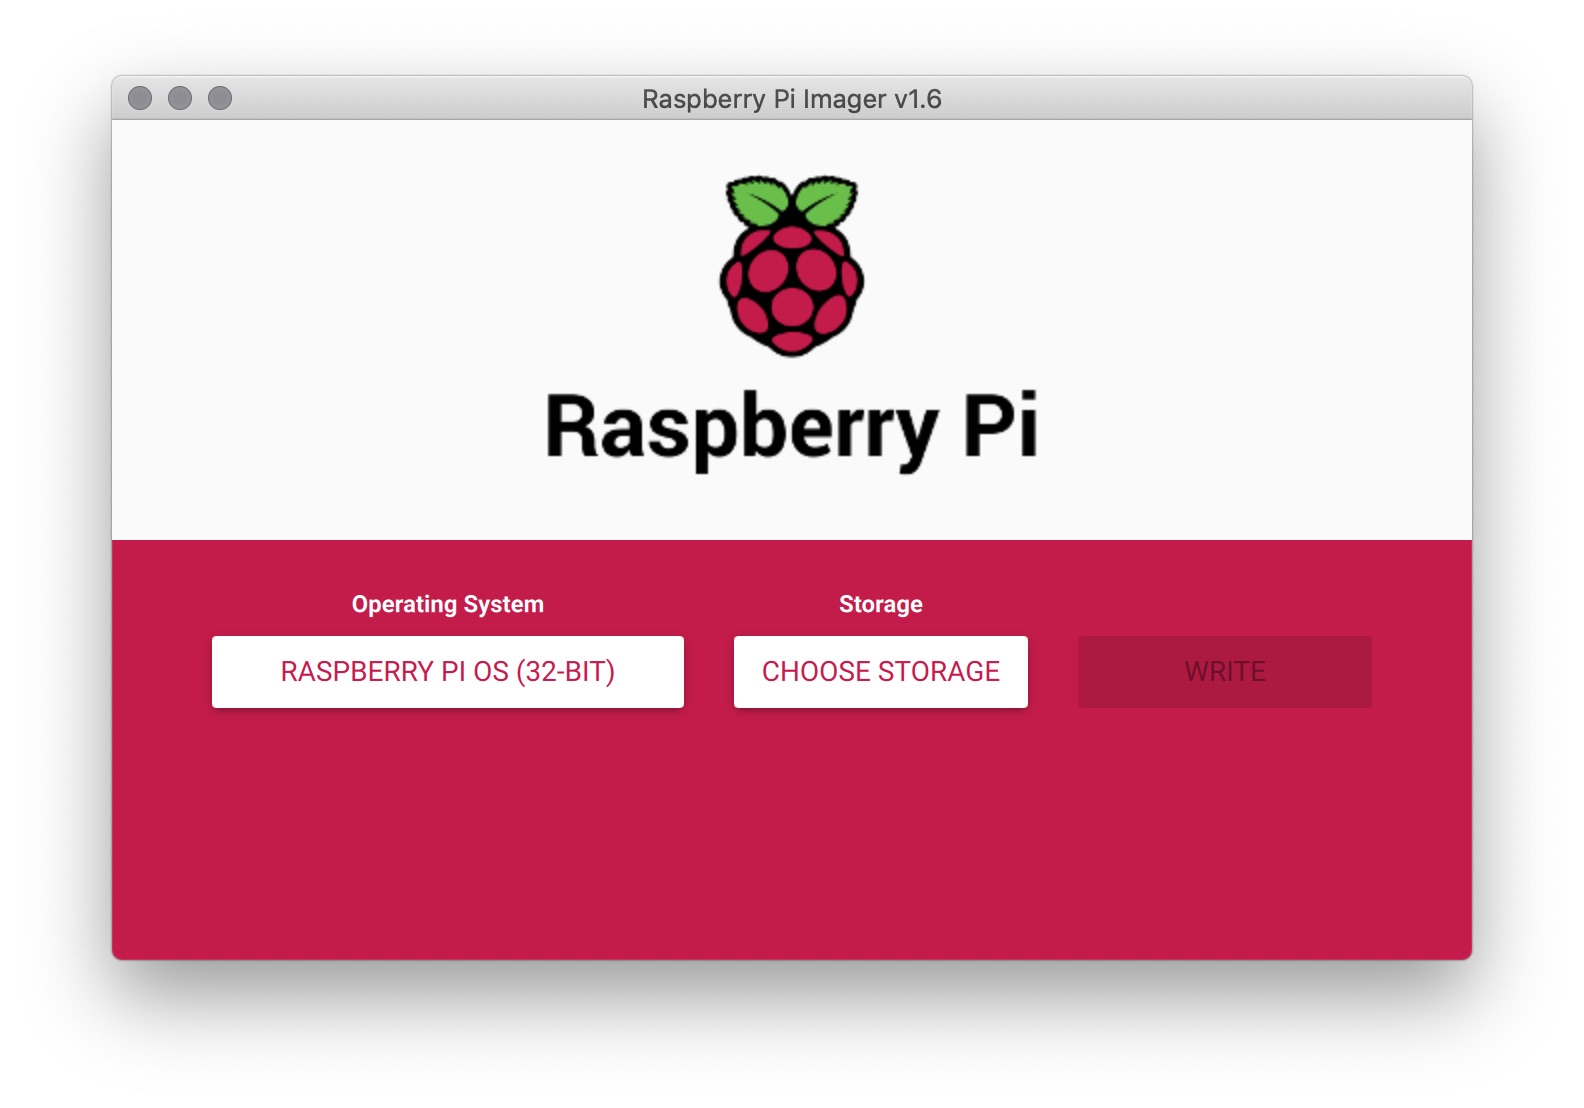
The first thing to do is to select the Operating System. In general I suggest to choose the Raspberry Pi OS, although a range of other Operating Systems are available to select. By selecting the top option, the software will download the latest image file (>1gb) from the internet.
Note: The latest Raspberry Pi OS (Bullseye) does not yet have good image and video recording support, so I would recommend to install the previous OS Buster. You can manually download it from this page under “raspios”. Other OS can be found here.
The good thing is that when you have already once downloaded the Raspberry Pi Image, you can use a cached version by selecting the second option in the list (Raspberry pi OS (other), and then selecting your cached version.
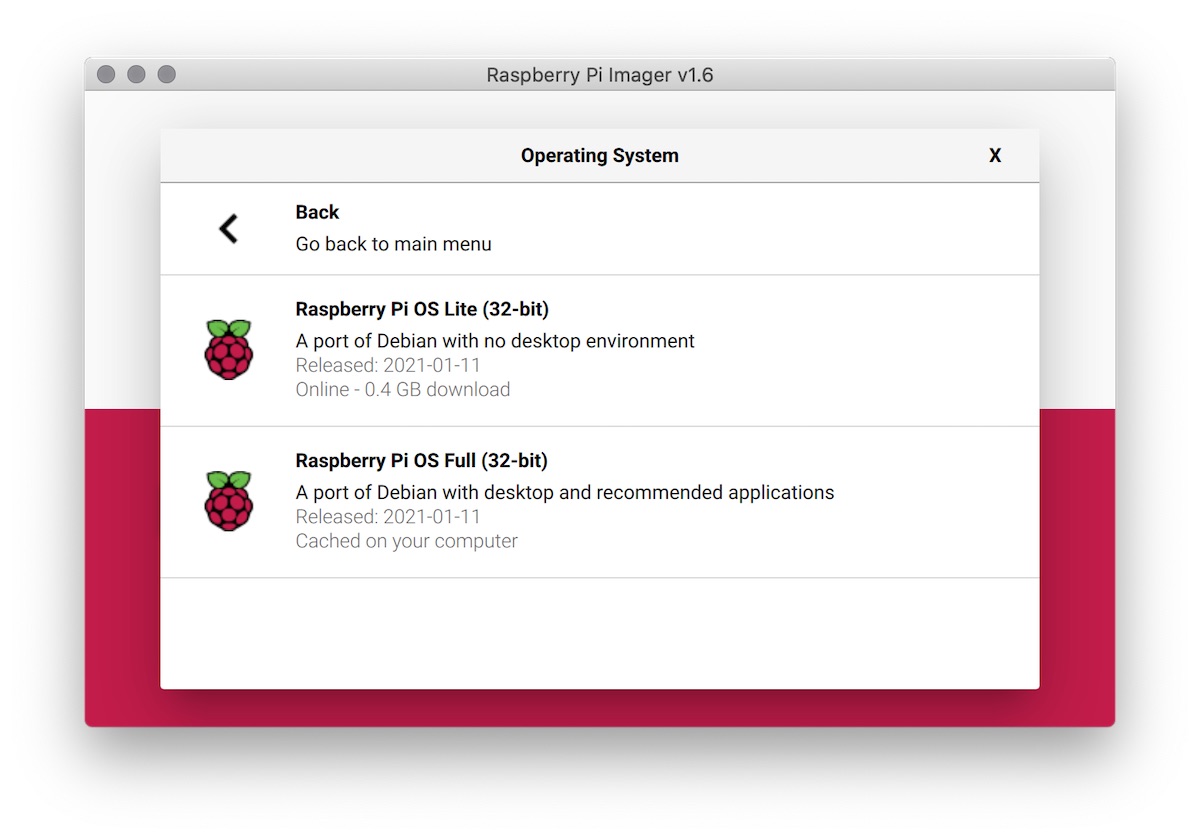
If you want to use an image file (such as to install the SD-card offline), you need to select the Use custom option at the bottom of the list.
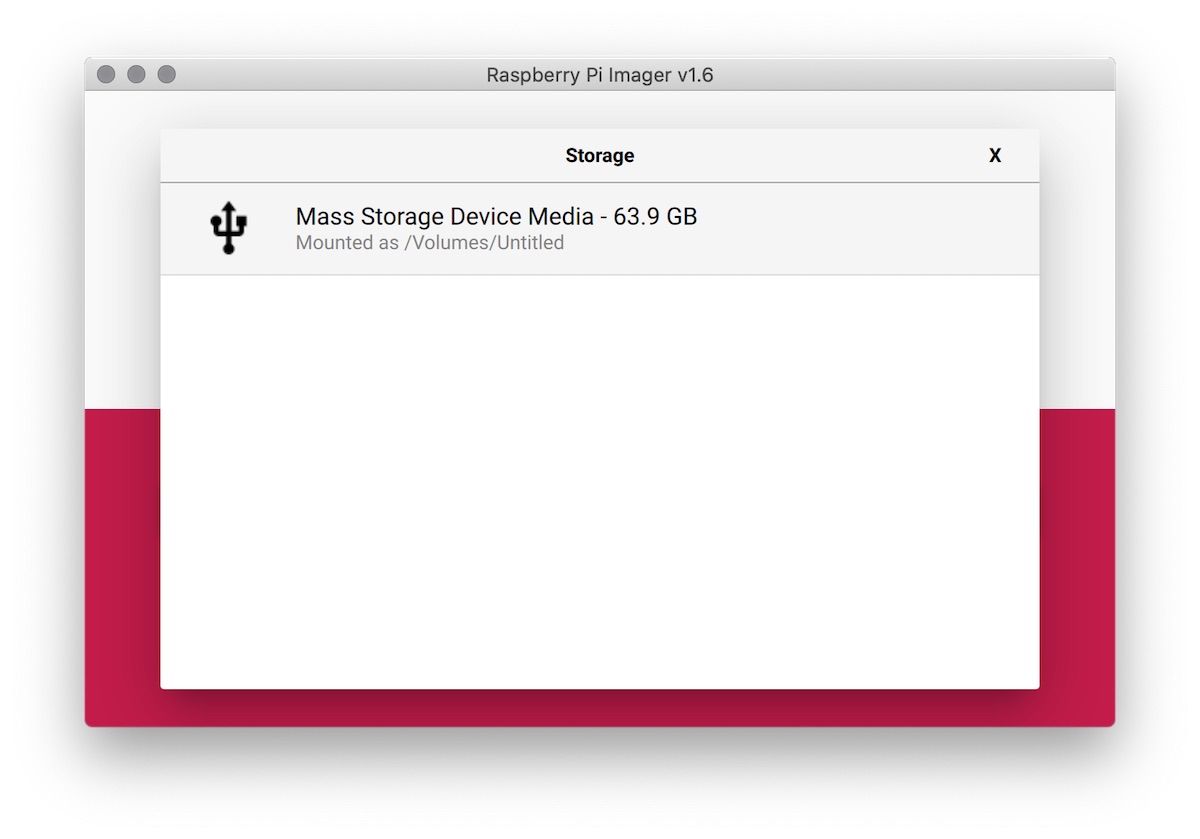
Next make sure your SD-card is mounted on your computer, click the STORAGE button, and select your SD-card. If it is not shown, try to remount it on your computer.
Setting advanced settings
Normally the next step would be to click WRITE and your Raspberry Pi Operating System would be written to the SD-card. However, in March 2021 a new version (v1.6) of the Raspberry Pi Imager software was released that adds a hidden menu with some great additional options that one would normally have to do manually after first boot! These include setting the hostname, enable SSH, configure the Wifi, and set locale settings, all before first boot. I strongly suggest to follow these additional steps to have a fully working Raspberry Pi in no time!
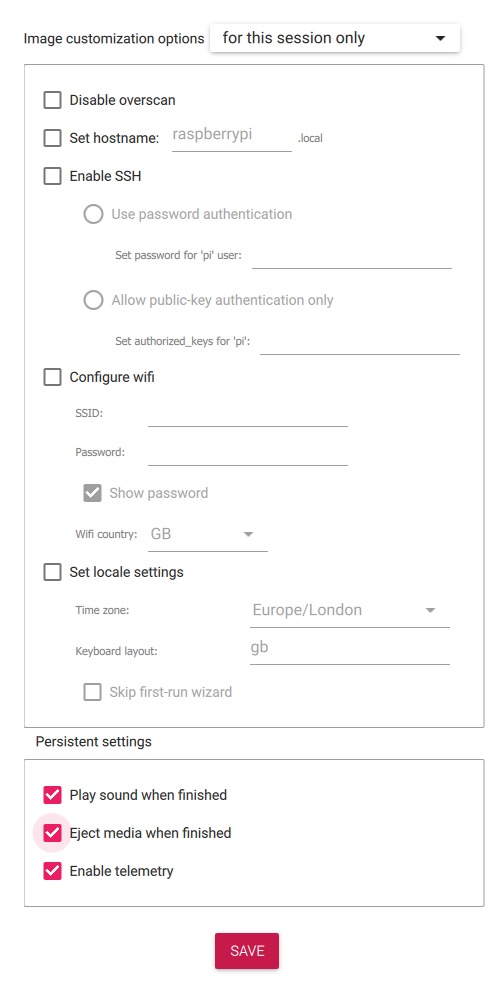
To access the hidden menu press ctrl+shift+x on windows and cmd+shift+x on a mac. For the hostname, choose a unique name to help increase the security of your Raspberry Pi.
Next click Enable SSH and set a new password for the standard pi user. Click Configure wifi and add the *SSID and Password of your Wifi network. These two options will make it possible to immediately start using your Raspberry Pi headless if needed. Make sure to also set the Wifi country code correctly as in some cases not setting this right may result in the wireless network not working properly.
Finally, I suggest to run select skip first-run wizard. Upon first boot in the Desktop interface, normally a welcome wizard is shown to help you set up all of the above and help with some additional steps that are easy to run manually.
Now click Save and finally click the WRITE button. As soon as the SD-card is written it will be automatically unmounted. This will take longer the larger the capacity of your SD-card.
Connecting
After installing the SD-card, plug it into your Raspberry Pi and start it up by connecting power. When you installed the operating system without using the advanced settings menu above, or for example when no local (wifi) network is available, you will need a screen, keyboard, and mouse to connect to your Raspberry Pi. However, with the advanced settings above you should be able to connect to your Raspberry Pi without these peripherals (i.e. “headless”) using SSH.
Using Etcher
I tended to use Etcher to install the operating system before the newest version of the Raspberry Pi Imager, so I have included the steps here how to use this alternative software for completeness. Also testing them side-by-side suggests that Etcher tends to be slightly faster than the Raspberry Pi Imager tool.
First download the free software from https://etcher.io, making sure to select the right version compatible with your operating system. Now set up the Etcher software and accept the license agreement and install.

To install you will need to have an image file of the operating system on your computer. You can for example download the latest version of the Raspberry Pi OS here. Now Open Etcher, select the downloaded image file, select the SD card, and click flash. That’s it.