Image and video recording with the Raspberry PI
The Raspberry Pi is a great tool for controlled and automated image and video recording. Below I help you get started!
Table of contents
Which camera to use
With the Raspberry Pi, it is possible to record with a wide range of cameras, primarily using the Camera Serial Interface to connect to dedicated camera modules to the board via a ribbon cable. A variety of modules exist, including two official models offered by the Raspberry Pi Foundation, the v2 and the HQ camera board.
Note that cameras may differ in their max resolution, which means that larger images may be recorded, such as at a resolution of (4056 x 3040 pixels) with the HQ camera module and (3280 x 2464 pixels) with the v2 module. However, as it is the GPU hardware not the camera that sets the video recording limits, the video recording capabilities of all cameras (at 5MB and above) are actually the same, with 1080p@30fps, 720p@60fps and 640p@90fps.
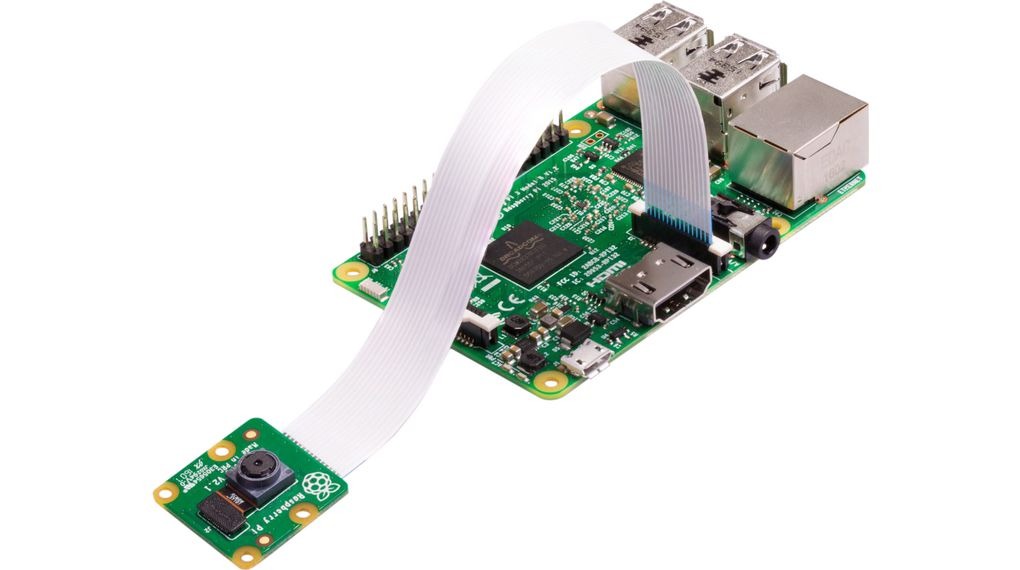
v2 Camera Module
The v2 camera has an 8MP sensor and is also available as an infrared model (Pi Noir) that can capture near-IR wavelengths up to 1000nm. It uses a small pinpoint lens but can actually record very sharp images, such as have been used to track small barcodes on moving birds and fish.
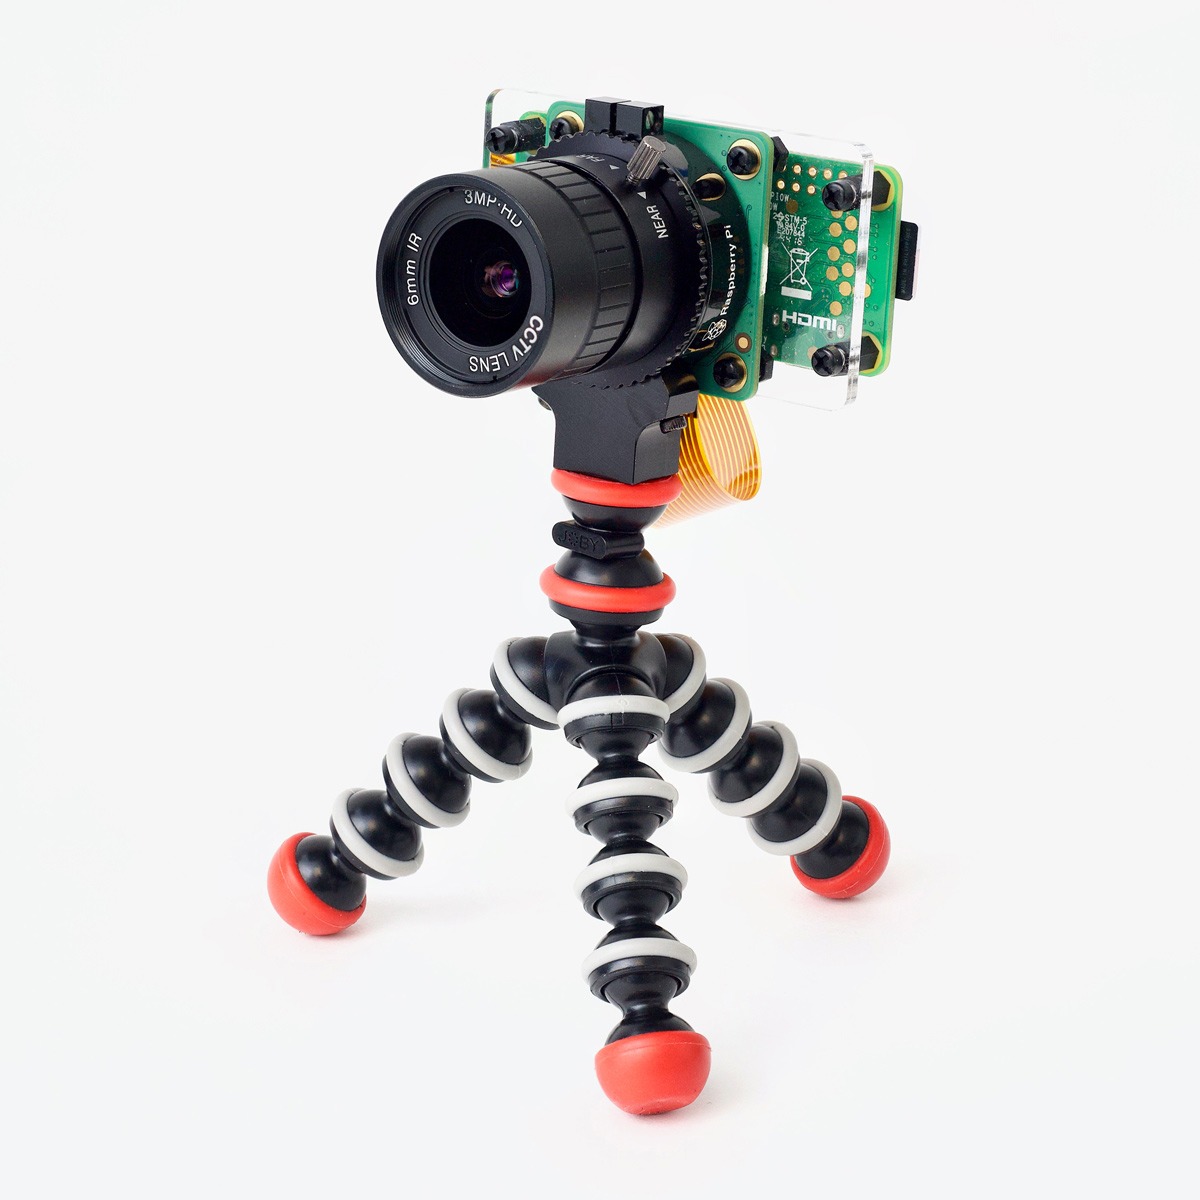
the HQ Camera Module
The HQ camera features a 12MP sensor and can connect C- and CS-mount interchangeable lenses and, with a lens mount adapter, even DSLR lenses can be used. This provides huge versatility for the camera’s field-of-view and thus its positioning, and facilitates accurately setting the camera focus, which is difficult with the tiny v2 camera.
3rd party Camera modules
Besides the official Raspberry Pi camera modules, a variety of 3rd party camera modules exists. The most advanced cameras are from Arducam, which offer a whole suite of cameras, some of which can record up to 16 megapixels, but tend to require special software. Other companies also offer camers with IR lights or that come with an M12 lens mount, providing a cheaper alternative to C- and CS-mount lenses.
USB Webcams
USB Webcams generally have inferior quality to the camera modules that connect to the CSI interface. They can also not be so easily controlled, but it is much easier to set up multiple camera’s with a single Raspbery Pi. Follow the guide how to work with USB webcams here.
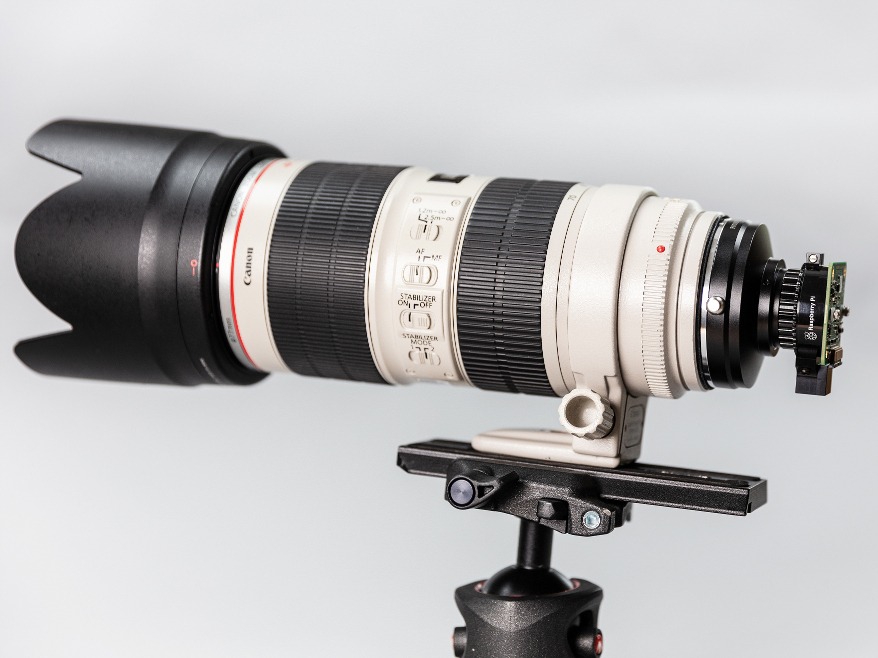
DSLR
Finally, it is also possible to connect and control a DSLR from the Raspberry Pi, such as using the gphoto2 library, which may help provide increased image quality but with limited flexibility and configurability. Also, using a special adapter, one can easily connect a high-quality DSLR lens to the HQ camera, thereby getting the benefits of both systems!
Setting-up the camera
Setting-up the camera is as simple as plugging in the ribbon cable into the camera and the Camera Serial Interface on the Raspberry Pi. If you are struggling, I suggest to follow the great and easy tutorial by the Raspberry Pi Foundation here.
Recording options with the Raspberry Pi
There are a variety of software packages to record with the Raspberry Pi. Here I provide a short description of some of the main solutions. For further details, follow the links provided below. Note that the latest Raspberry Pi OS (Bullseye) changed the recording modules, so using an older OS such as Buster is recommended!
raspicam
First, one can control the camera module directly from the command line with the native raspicam command line tools, which include raspistill to take still images and raspivid for videos. These provide a wide range of recording options, including the possibility to preview the camera stream, adjust the camera settings (e.g. contrast, brightness, saturation, iso, shutter speed), and set exposure mode and white balance.
Recording commands have to be written on a single line but can be integrated in bash scripts for automated recordings. For example, to record an image, a timelapse, and a video:
raspistill -t 2000 -o image.jpg -w 640 -h 480
raspistill -t 600000 -tl 10000 -o image_num_%03d_today.jpg -l latest.jpg
raspivid -t 10000 -o video.h264 -f 5
Detailed documentation can be found on the Raspberry Pi website.
picamera
picamera provides a pure Python interface to the Raspberry Pi camera module, greatly facilitating users to write their own recording scripts, including to record and stream videos, capture consistent images and timelapses, or record to NumPy arrays for immediate processing. It is an incredibly versatile bit of software and the recording options are endless.
For example, to record a timelapse:
from time import sleep
from picamera import PiCamera
from datetime import datetime, timedelta

def wait():
    # Calculate the delay to the start of the next hour
    next_hour = (datetime.now() + timedelta(hour=1)).replace(
        minute=0, second=0, microsecond=0)
    delay = (next_hour - datetime.now()).seconds
    sleep(delay)

camera = PiCamera()
camera.start_preview()
wait()
for filename in camera.capture_continuous('img{timestamp:%Y-%m-%d-%H-%M}.jpg'):
    print('Captured %s' % filename)
    wait()
and to record a video to a file:
import picamera

camera = picamera.PiCamera()
camera.resolution = (640, 480)
camera.start_recording('my_video.h264')
camera.wait_recording(60)
camera.stop_recording()
The package comes with very detailed documentation and further examples, which can be found here
pirecorder
pirecorder is a recording package for python that I developed specifically with scientific research in mind. Built on the picamera package, it provides a simple-to-use solution to run large numbers of controlled and automated image and video recordings using optimal settings.
It consists of a number of interconnected modules to facilitate key aspects of media recording, including setting-up and configuring the camera, recording images, videos, time-lapses, and standardised video sequences with automatic file-naming, easy scheduling of future recordings, and converting of recorded media with resize, timestamp, and monitoring options.
All functionalities are designed to make it very straightforward, even for users with limited coding experience, to configure, initiate, schedule, and convert recordings.
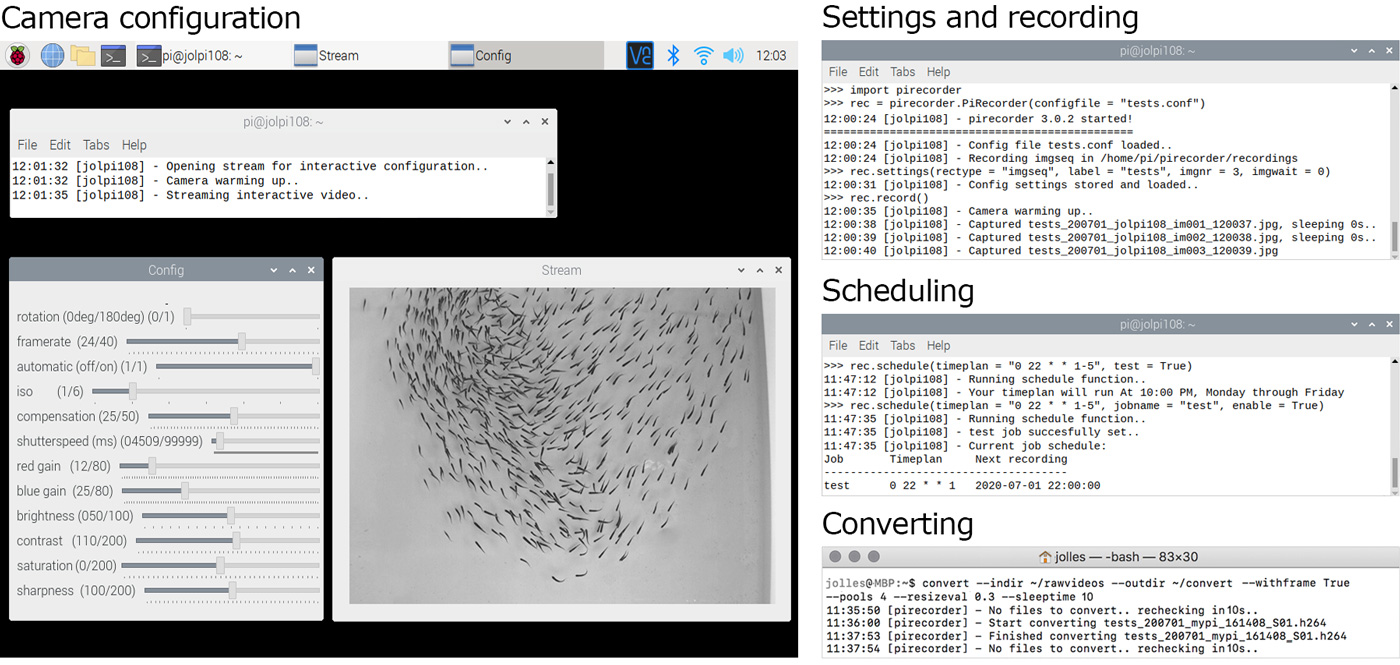
In particular, pirecorder offers interactive streaming functionalities to facilitate users in positioning and focusing the camera, selecting the desired white-balance and other image parameters using trackbars, and set the ideal camera shutter speed.
A core functionality of pirecorder is that it works with configuration files. These files make it possible to store a wide range of camera and recording settings that are then automatically used for recordings without requiring further user input. Configuration files can be edited directly, or parameters can be set in python or using the interactive video stream functionalities.
For example, to run an interactive video stream and adjust the camera settings with trackbars:
rec.camconfig()
To easily configure the camera using a wide range of settings:
rec.set_config(rectype = "vid", vidduration = 600, viddelay = 20, vidquality = 30, viddims = (1640, 1232), vidfps = 24)
rec.record()
Schedule to record in the future:
rec.schedule(timeplan = "0/30 7-17 * * 1-5", jobname = "weekjob", enable = True)
And convert media:
convert --indir VIDEOS --outdir VIDEOS/CONVERTED
Pirecorder comes with a dedicated documentation website with detailed information and tutorials (https://jollejolles.github.io/pirecorder/) and an associated paper was published in the Journal of Open Source Software. You an read it here.
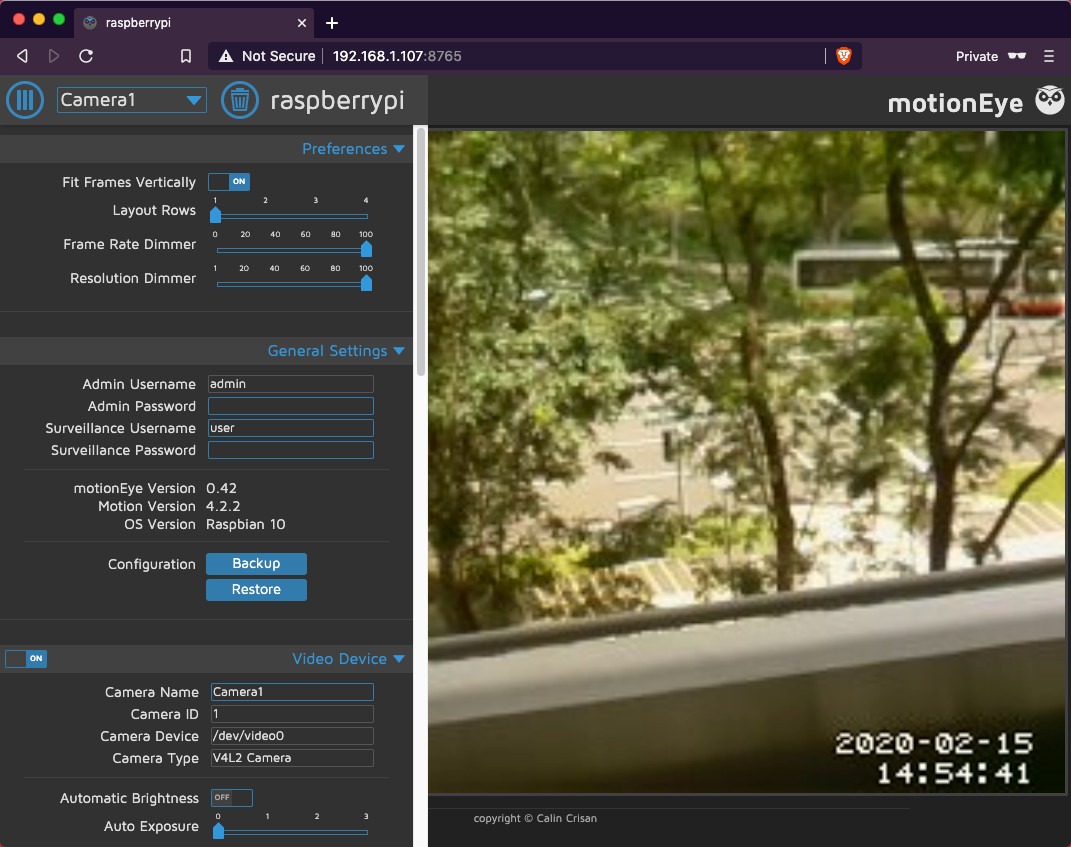
Motion
Motion is a highly customisable command line tool to monitor video signals with motion detection. MotionEye provides a user-friendly web frontend on top of Motion to control the motion software from the browser.
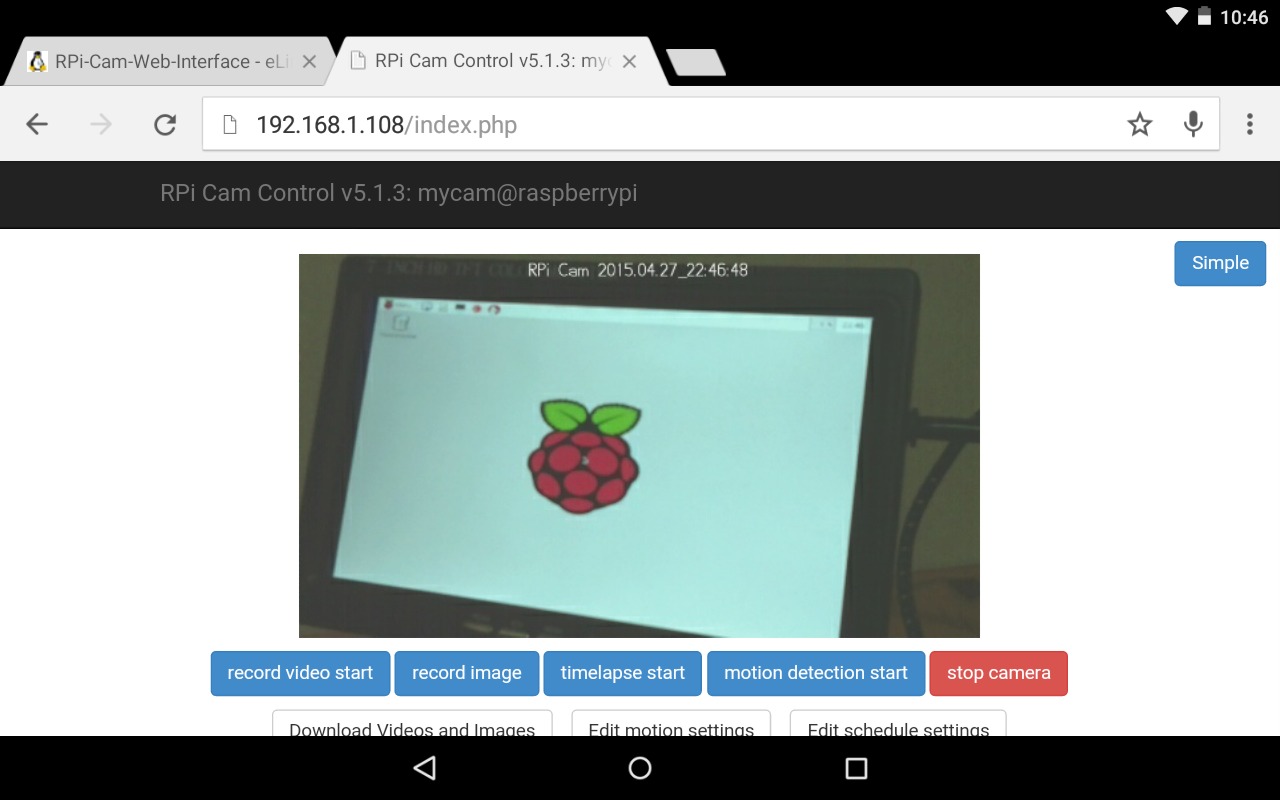
RPi Cam Web Interface
Finally, RPi Cam Web Interface is another web interface for the Raspberry Pi Camera module that provides high configurability and can be used for a wide variety of applications.